Sync Setup - Ableton Live! on the same computer
Introduction
The following explanation and screenshots are related to Ableton Live! version 10, but the steps will be similar for other versions.
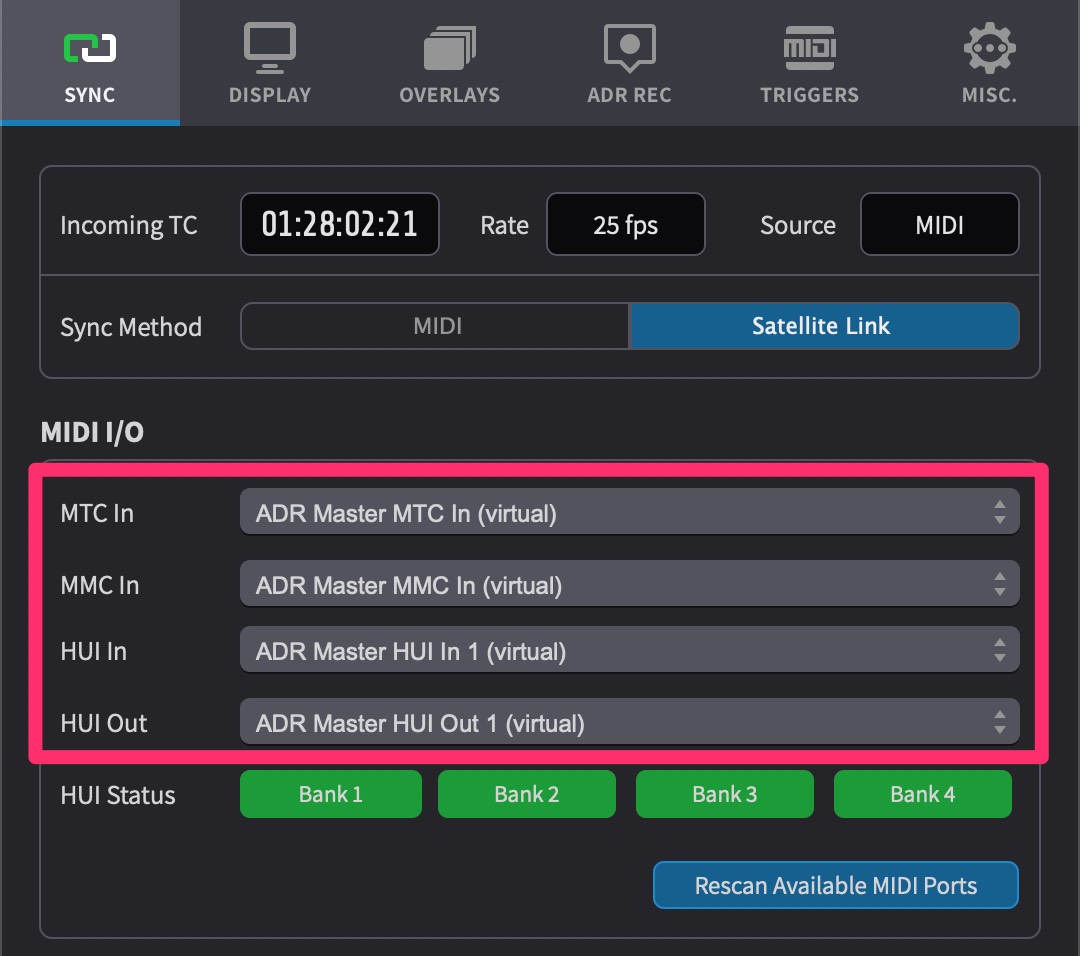
Video Sync features virtual MIDI ports, which mostly removes the need to create network MIDI sessions in Audio MIDI Setup in order to connect to a DAW on the same computer. When Video Sync is launched, it will create virtual MIDI ports named Video Sync MTC In, Video Sync MMC In & Video Sync Trigger In - which will automatically be pre-selected in Video Sync, & visible in your DAW.
 {width=70%}
For this reason, it is advised to always launch Video Sync before launching the DAW. Failure to do so, may cause some of these settings to be reset to default - such that they need to be re-configured in Ableton Live! again.
Some DAWs do not reconnect the virtual ports automatically if Video Sync is opened after the DAW. In cases where this happens often, it may be better to consider setting up ports via Audio MIDI Setup on the same computer.
Video Sync MTC / MMC Setup
To show the MIDI I/O options in Video Sync, first navigate to the SYNC tab of the Preferences / Settings window.
Set the Sync Source field to Other.
Next, make sure that all the ports are set to their default values Video Sync MTC In (virtual) & Video Sync MMC In (virtual) as per the image below:
 {width=70%}
Ableton Live! MTC (MIDI Timecode) Setup
Although Ableton acknowledge the importance of supporting MIDI Timecode and MIDI Machine Control in future, Live! currently does not natively support either protocol. To work around this limitation, a Max4Live instrument called LiveMTC is required.
LiveMTC does not support Tempo changes due to its reliance on Rewire.
First confirm whether Max4Live was installed with the current installation of Live! If you are running Ableton Live! Suite - then it will already have been installed. If you are running Ableton Live! Standard version, you may need to purchase, download & install Max4Live separately.
Next download LiveMTC.
Unzip the downloaded file. Move the unzipped folder to the Applications folder.
The unzipped folder contains the Live MTC Bridge app and the MTC.amxd plugin.
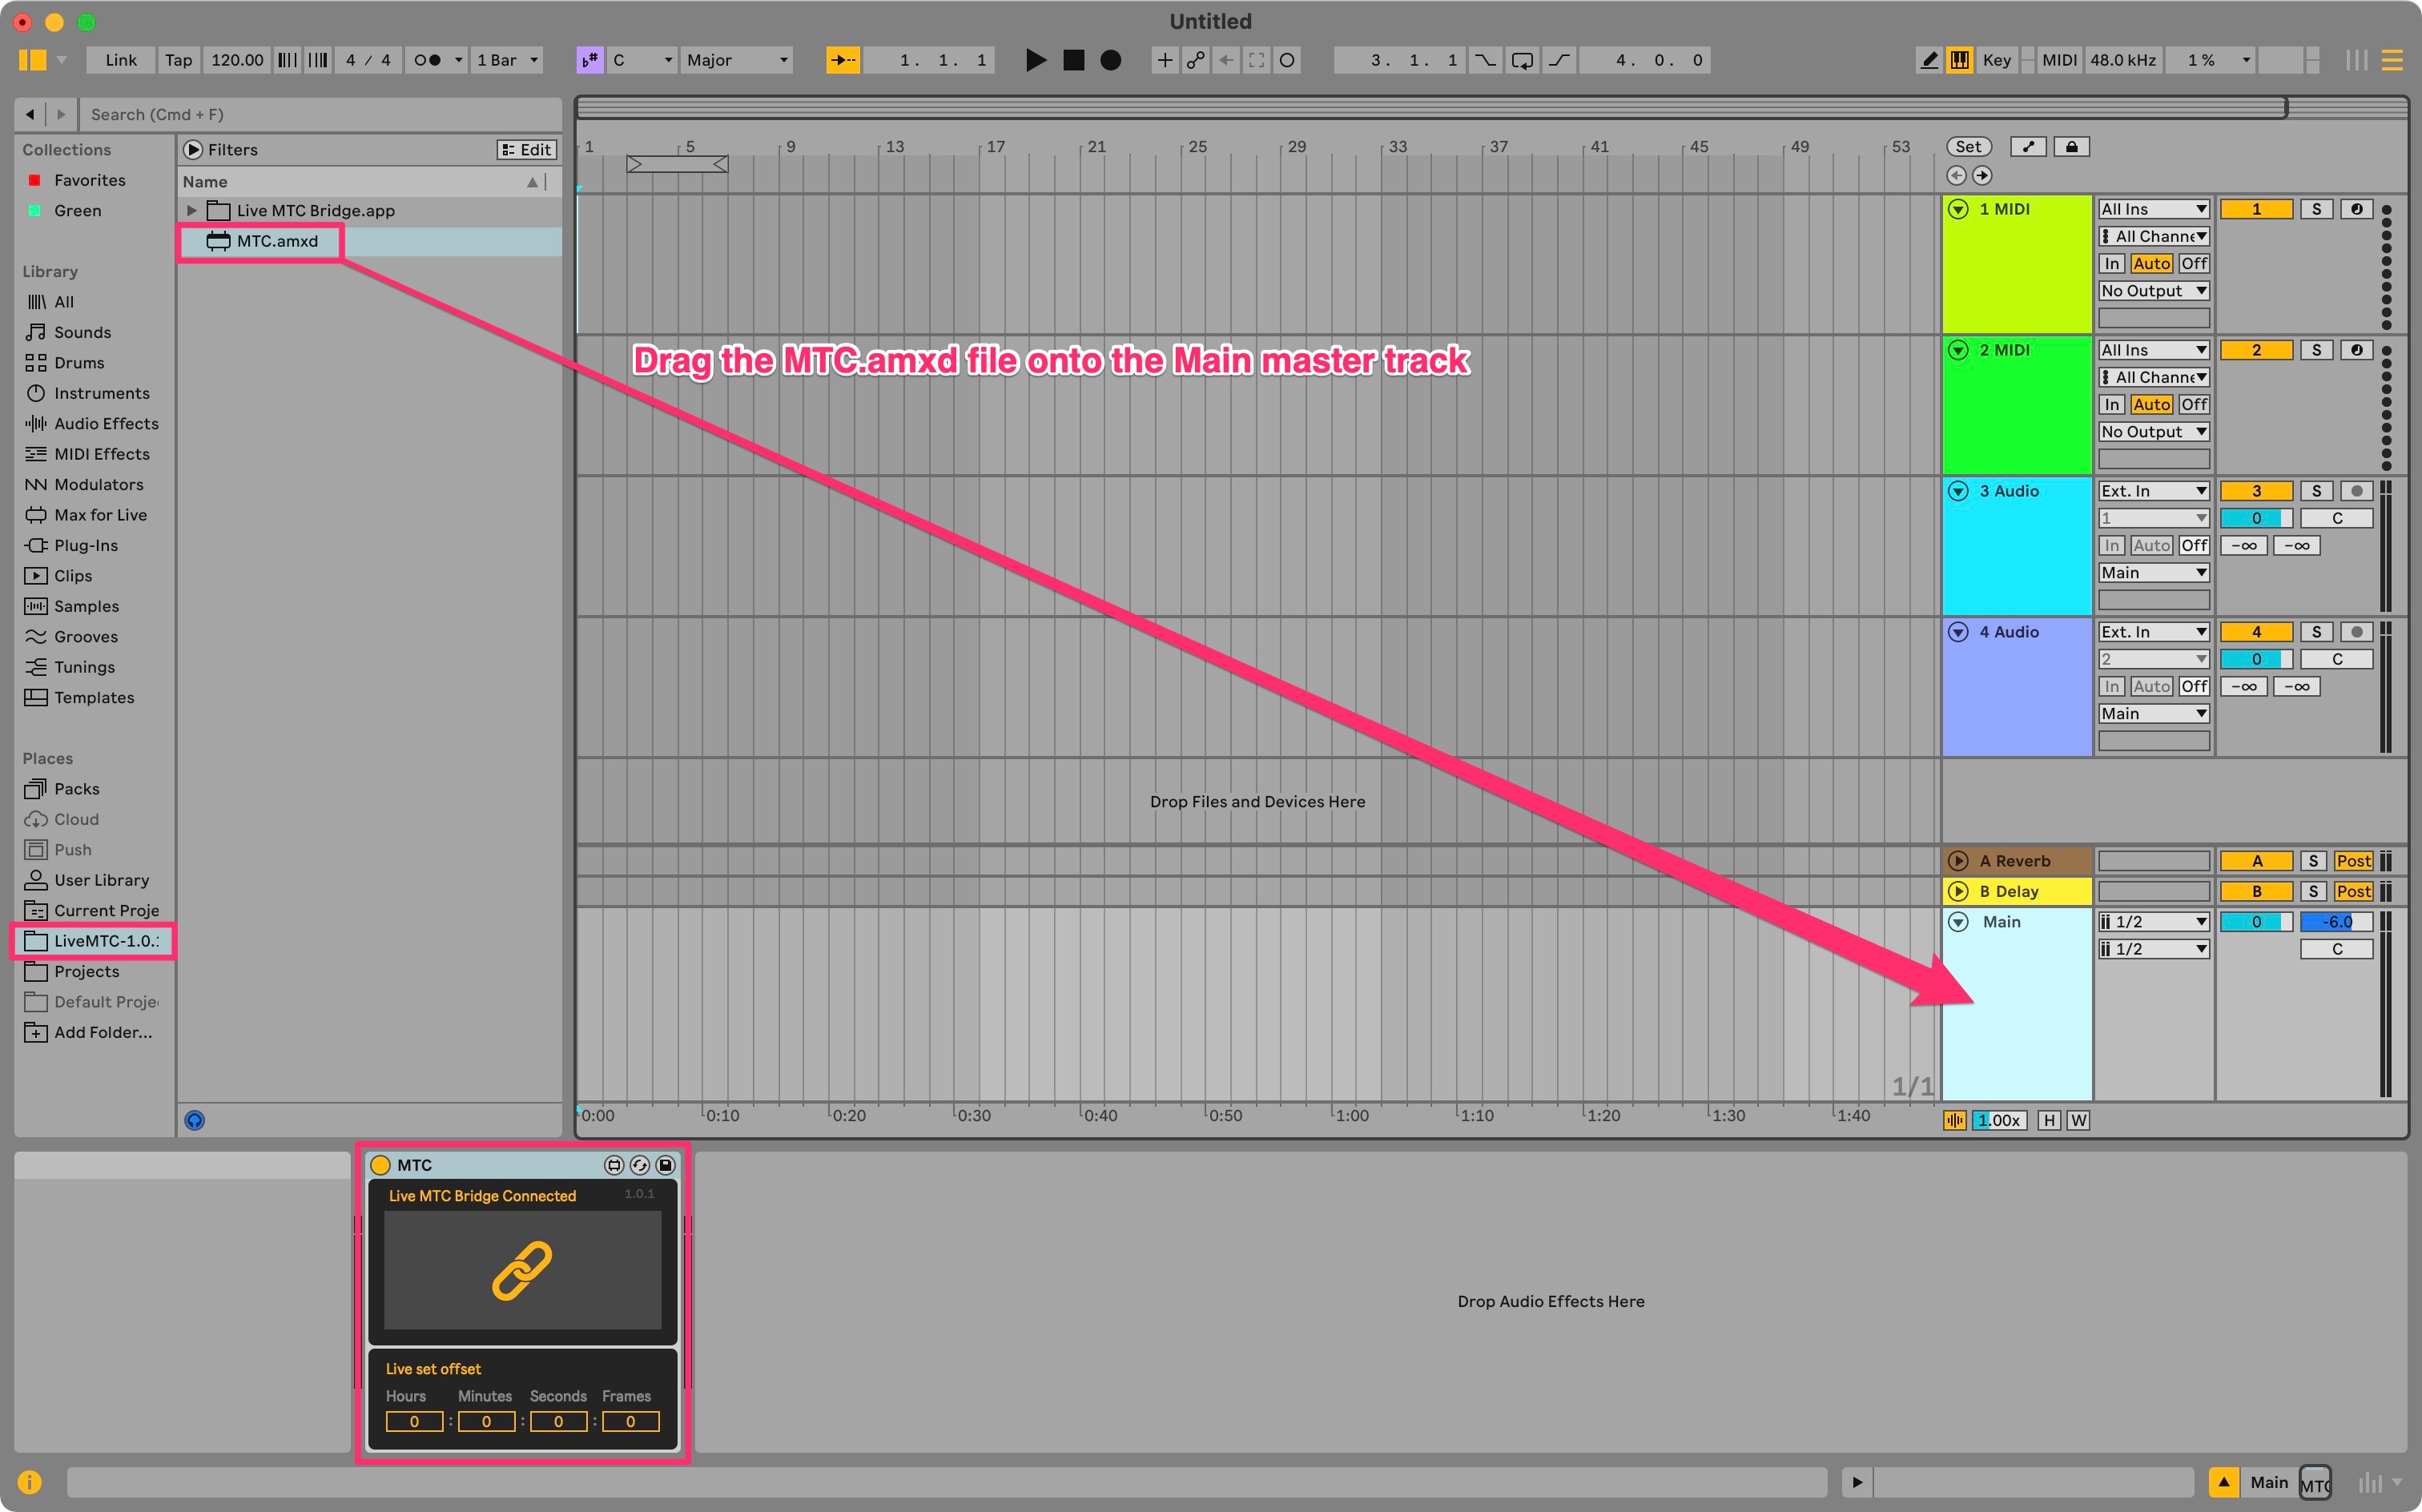
Drag this folder onto Live!, under Places in the left browser to store it for future use.
From the new shortcut to the folder in Places, drag the MTC.amxd plugin onto the Master track in the current session.
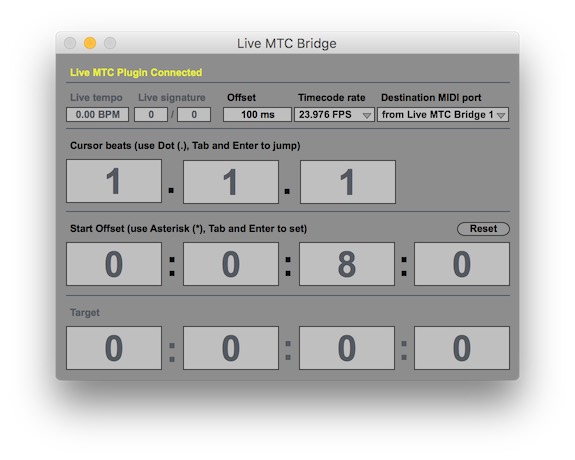
In the Finder go to the Applications>LiveMTC folder & launch the Live MTC Bridge app.
 {width=80%}
Set the Destination MIDI port in the dropdown to Video Sync MTC In (virtual).
If Video Sync is launched after the Live MTC Bridge app, Live MTC Bridge will need to be restarted, as it only scans for the available MIDI ports when starting up.
If necessary, set the timecode offset to match the Video Sync movie timecode settings.
Ableton Live! MMC (MIDI Machine Control) Setup
There is no need to set up MMC separately with Abelton Live! as Live MTC Bridge sends MMC style positioning information using a bespoke implementation of MIDI Timecode (MTC).
However, due to a limitation in the way that Showsync have implemented MMC in LiveMTC, support for the playhead moving to the correct stationary position when clicking around the timeline of the Ableton Live! is only possible with 23.976 & 24fps.
In this case, hit play & stop to update the playhead position using MTC.
We would like to thank the developer, Showsync for creating the LiveMTC bridge application. More information on using LiveMTC can be found here.
Enabling Synchronised playback
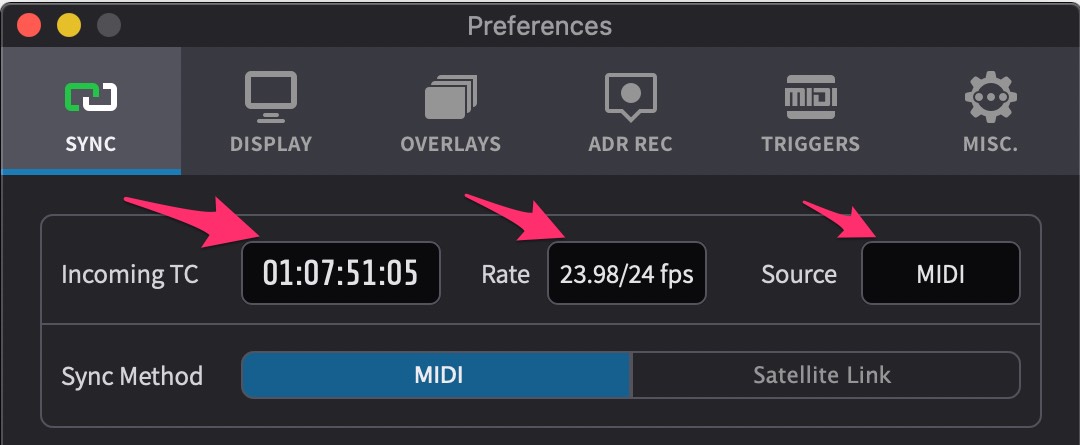
When hitting play or scrubbing within Ableton Live!, both the incoming timecode field should now be seen incrementing & the timecode rate displayed within the Incoming TC section to the left of the main timecode counter in Video Sync.
 {width=70%}
If the Sync button to the left of the transport buttons isn't already blue, click on it to activate it to follow external sync.
 {width=40%}
Video Sync MTC/MMC sync is now online & ready to go. Hit play in Ableton Live! and Video Sync will play back in sync.
Dealing with MTC sync with high frame rate content
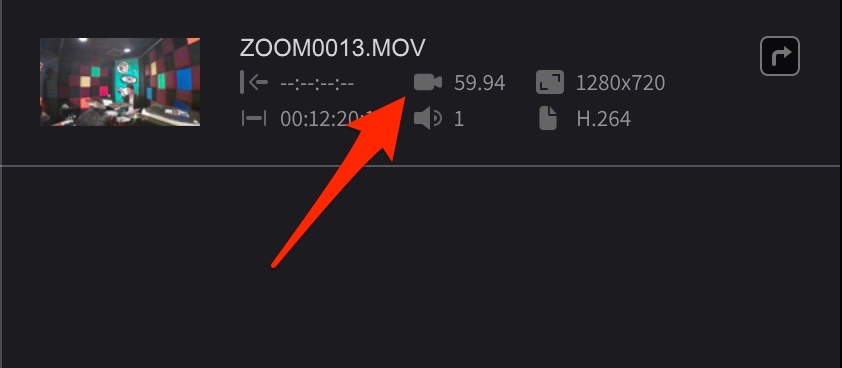
Video Sync allows for synchronised playback of clips running at up to 60 frames per second. Being a standard from the 80s, MIDI timecode (MTC) does not support frame rates higher than 30 frames per second. To be able to play timelines with these high frame rate clips in sync to MTC, Video Sync will try to match the incoming TC at half the frame rate. For example, if the timeline has a 50fps clip, Video Sync will play it in sync if a 25fps MTC source is supplied.
In the timeline list, the timeline frame rate is shown here:
 {width=60%}
